
Why Images From the Internet Print Pixelated
Images saved from Google, Facebook or messaging apps are usually far too small and already compressed for a shirt print. On a phone they look sharp because the screen is small, but blown up to a 35×40cm print area each pixel becomes a visible square, text edges turn jagged and colors smear. To fill a 35×40cm area at 300dpi you need roughly 4,134 × 4,724 pixels — most images from the web are a small fraction of that.
This guide shows you how to check an image before sending it to print, spot the signs it will print badly, and pick the right fix — including when the honest answer is “this one can’t be saved”.
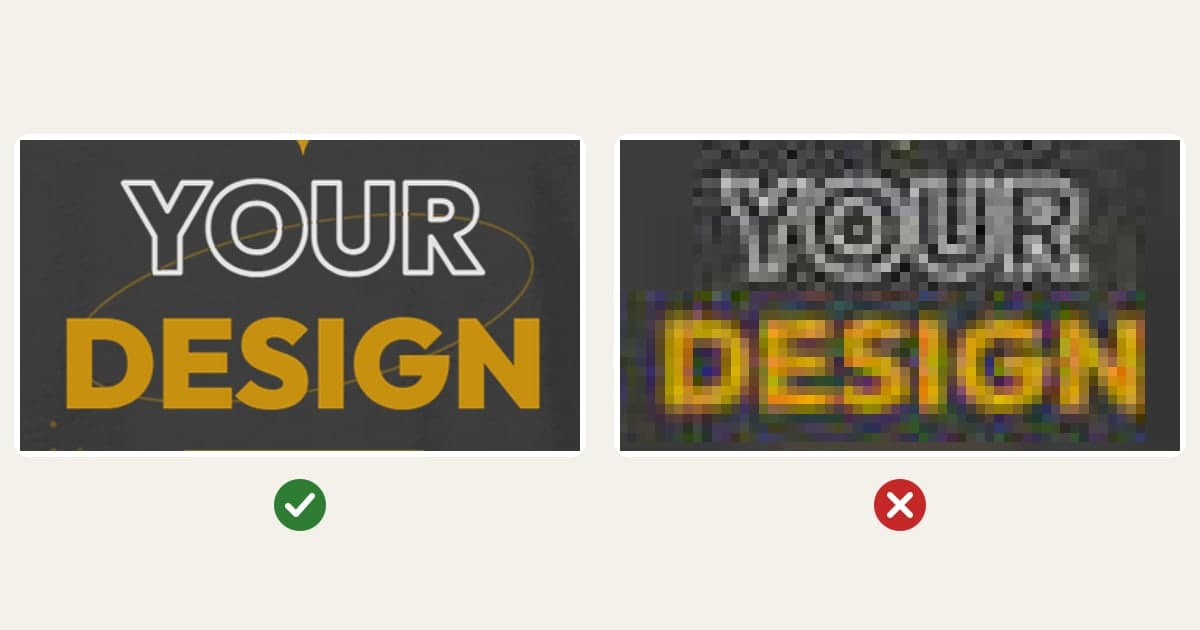
Why web images fall apart in print
- You saved a thumbnail: image search results and previews are often a few hundred pixels, not the original.
- Social networks and messaging apps compress images when you post or send them — fine detail and text edges go first.
- A screenshot only has the resolution of the part of the screen you captured.
- A JPG saved over and over loses more detail and gains noise around text each time.
- Logos taken from websites are usually small files — fine on screen, not enough to print.
Work out how many pixels you need
The formula: pixels = print size (cm) ÷ 2.54 × dpi. Startee recommends 300dpi for a sharp print at close viewing distance. 150dpi is a lower level many accept for large prints seen from a distance, but up close it looks soft.
| Print area | Size | Needed at 300dpi | Needed at 150dpi |
|---|---|---|---|
| One side (standard area) | 35 × 40 cm | 4,134 × 4,724 px | 2,067 × 2,362 px |
| Chest logo | 10 × 10 cm | 1,181 × 1,181 px | 591 × 591 px |
To check an image’s pixel size: on Windows, right-click the file → Properties → Details; on a Mac, open it in Preview → Tools → Show Inspector; on a phone, open the photo’s details in your gallery. For example, a 1,200 × 1,200 px image prints sharply as a 10 × 10 cm chest logo but will pixelate if stretched across the whole back.
Signs an image will print badly
Open the image at exactly 100% zoom (one screen pixel per image pixel) and look for:
- Jagged text edges and outlines where you can see each pixel step.
- Blotchy 8×8 blocks across flat areas of color — JPG compression artifacts.
- Noisy halos and color smearing around text and logos.
- A “transparent background” download that actually has a gray-and-white checkerboard baked into the image — that checkerboard will print exactly as it looks.
How to fix it, in the order to try
1. Find the original or a vector file
This is always the best fix. Ask the photographer or designer for the original; for a company, school or club logo, ask the communications team for a vector file (AI, PDF, SVG) — vectors can be enlarged to any size without breaking up. See preparing artwork for t-shirt printing.
2. Redraw it as a vector if it’s a logo, text or simple graphic
Logos with few colors, lettering and flat graphics can be converted to vector. Startee Mockup has a free image-to-vector tool that runs right in your browser. It works well on clean, few-color artwork; it’s the wrong tool for photos of people or scenery, which aren’t made of flat color shapes.
3. Print smaller to match the image
If there’s no bigger image, let the image decide the print size. An image that can’t fill a whole back can still print beautifully small, such as a chest logo — use the table above to find the largest size it supports.
4. AI upscaling: how far it can go
AI upscaling tools can make a slightly-too-small image look sharper, because the AI guesses and draws in extra detail. But because it’s guessing, faces can distort slightly, small text can warp and patterns can be redrawn wrongly. An image that’s tiny or heavily compressed can’t be recovered — the information is gone. If you use one, check the result at 100% zoom before sending it to print, especially faces and text.
5. Change the style to hide missing detail
Turning an image into a halftone dot, duotone or risograph style can make a low-detail picture look like a deliberate design. Startee Mockup has browser-based graphic effects to try this quickly. If you need to drop the background, use the online background remover — the image is processed on your own device.
Web images and copyright
Almost every image online has an owner: photos, brand logos, cartoon characters, pictures of celebrities. Printing a one-off gift for yourself is different from printing in bulk to sell or hand out. Prefer your own photos and artwork, licensed stock, or images whose license allows commercial use. This is general guidance, not legal advice.
Send your image to Startee to check first
If you’re not sure an image is sharp enough, send it by phone or Zalo for Startee to check before printing, or place it on a shirt yourself with the online design tool. Detailed photos are printed with DTG, which prints pixel by pixel and keeps detail and gradients — as long as the original has enough resolution (see does a photo print look blurry on a shirt).